How to draw a face step by step with pencil
Table of Contents
Table of Contents
Are you tired of drawing cartoonish faces and want to take your drawing game to the next level? Look no further than this guide on how to draw realistic faces step by step. With some practice and patience, you can create stunning portraits that capture the essence of your subject.
Many people struggle with drawing realistic faces, whether it’s creating accurate proportions or achieving lifelike shading. It can be frustrating to constantly make mistakes and not know how to correct them. But with the right techniques and guidance, anyone can improve their drawing skills and create impressive portraits.
The first step in drawing realistic faces is to break down the process into manageable steps. Start with a rough sketch to establish the basic shape and proportions of the head and facial features. Then, gradually work on refining the details and adding shading to create a sense of depth and dimensionality.
To achieve realistic shading, pay close attention to the light source and how it affects the different areas of the face. Use a range of pencils to vary the level of darkness and create a realistic sense of contrast. Don’t be afraid to use erasers to adjust mistakes and refine details as you go.
In summary, to draw realistic faces step by step, you need to understand the basic structure of the face, pay attention to lighting and shading, and practice regularly to improve your skills. With dedication and perseverance, anyone can become a skilled portrait artist.
Understanding Proportions
As mentioned earlier, the first step in drawing realistic faces is to establish the basic proportions of the head and facial features. This can be challenging, as everyone’s face is slightly different in shape and size. However, there are some general guidelines you can follow to create a good foundation for your drawing.
I remember when I first started learning how to draw realistic faces, I struggled with getting the proportions right. But as I continued to practice, I began to notice patterns in the way different features related to each other. For example, the distance between the eyes is approximately equal to the width of one eye, and the bottom of the nose lines up with the bottom of the ears.
One helpful trick is to use a grid system to break the face down into smaller, more manageable sections. This can help you maintain accurate proportions and ensure that each feature lines up correctly with the others.
Creating Lifelike Shading
Once you have established the basic proportions of the face, it’s time to start adding shading to create a sense of depth and dimensionality. This can be accomplished through the use of light and shadow, which help to define the contours of the face and create a sense of volume.
To create realistic shading, it’s important to pay attention to the direction and intensity of the light source. Think about where the light is coming from and how it is affecting the various parts of the face - for example, the nose may cast a shadow on the upper lip, or the cheekbones may catch the light and appear more prominent.
Another useful technique is to vary the pressure and thickness of your pencil strokes to create different levels of darkness and texture. You can also use an eraser to selectively lighten areas of the drawing and create highlights.
Practice Makes Perfect
As with any skill, the key to mastering how to draw realistic faces step by step is to practice regularly. It can be frustrating to make mistakes or not see immediate improvement, but remember that even the best artists started out as beginners. The more you practice, the better you will become.
Find inspiration in other artists’ work, and try experimenting with different styles and techniques to develop your own unique voice. Remember that there’s no right or wrong way to draw a portrait - embrace your own creative instincts and enjoy the process!
Experiment with Reference Photos
One of the best ways to improve your skills is to work from reference photos. This allows you to study real-life examples and practice creating realistic likenesses. Look for photos with good lighting and clear, defined features, and consider using them as a starting point for your next drawing.
Take things slow and don’t be afraid to make mistakes. As you continue to practice and refine your technique, you’ll begin to notice improvement in your work.
Question and Answer
Q: What pencils and paper should I use to draw realistic faces?
A: It’s a matter of personal preference, but many artists prefer to use a range of graphite pencils (ranging from 2H-8B) for drawing portraits. As for paper, try to use something with a smooth surface for more detailed work.
Q: How do I create realistic texture in hair and skin?
A: To create realistic texture, use a range of pencil strokes (such as crosshatching or stippling) to simulate the appearance of hair or skin. Vary the thickness and direction of your strokes to create a sense of depth and dimensionality.
Q: How can I improve my proportions?
A: Try using a grid system to break down the face into smaller sections and maintain accurate proportions. You can also study images of faces to look for patterns and relationships between different features.
Q: How long does it take to learn how to draw realistic faces?
A: It varies from person to person, but generally, it takes a lot of practice and patience to master the art of portrait drawing. Be patient with yourself and don’t be afraid to make mistakes - every attempt is a chance to learn and improve.
Conclusion of How to Draw Realistic Faces Step by Step
Drawing realistic faces might seem daunting at first, but with the right techniques and plenty of practice, anyone can improve their skills and create stunning portraits. Remember to focus on proportions, lighting, shading, and texture, and be patient with yourself as you continue to refine your technique. With dedication and perseverance, you can become a skilled artist and capture the essence of your subject in your drawings.
Gallery
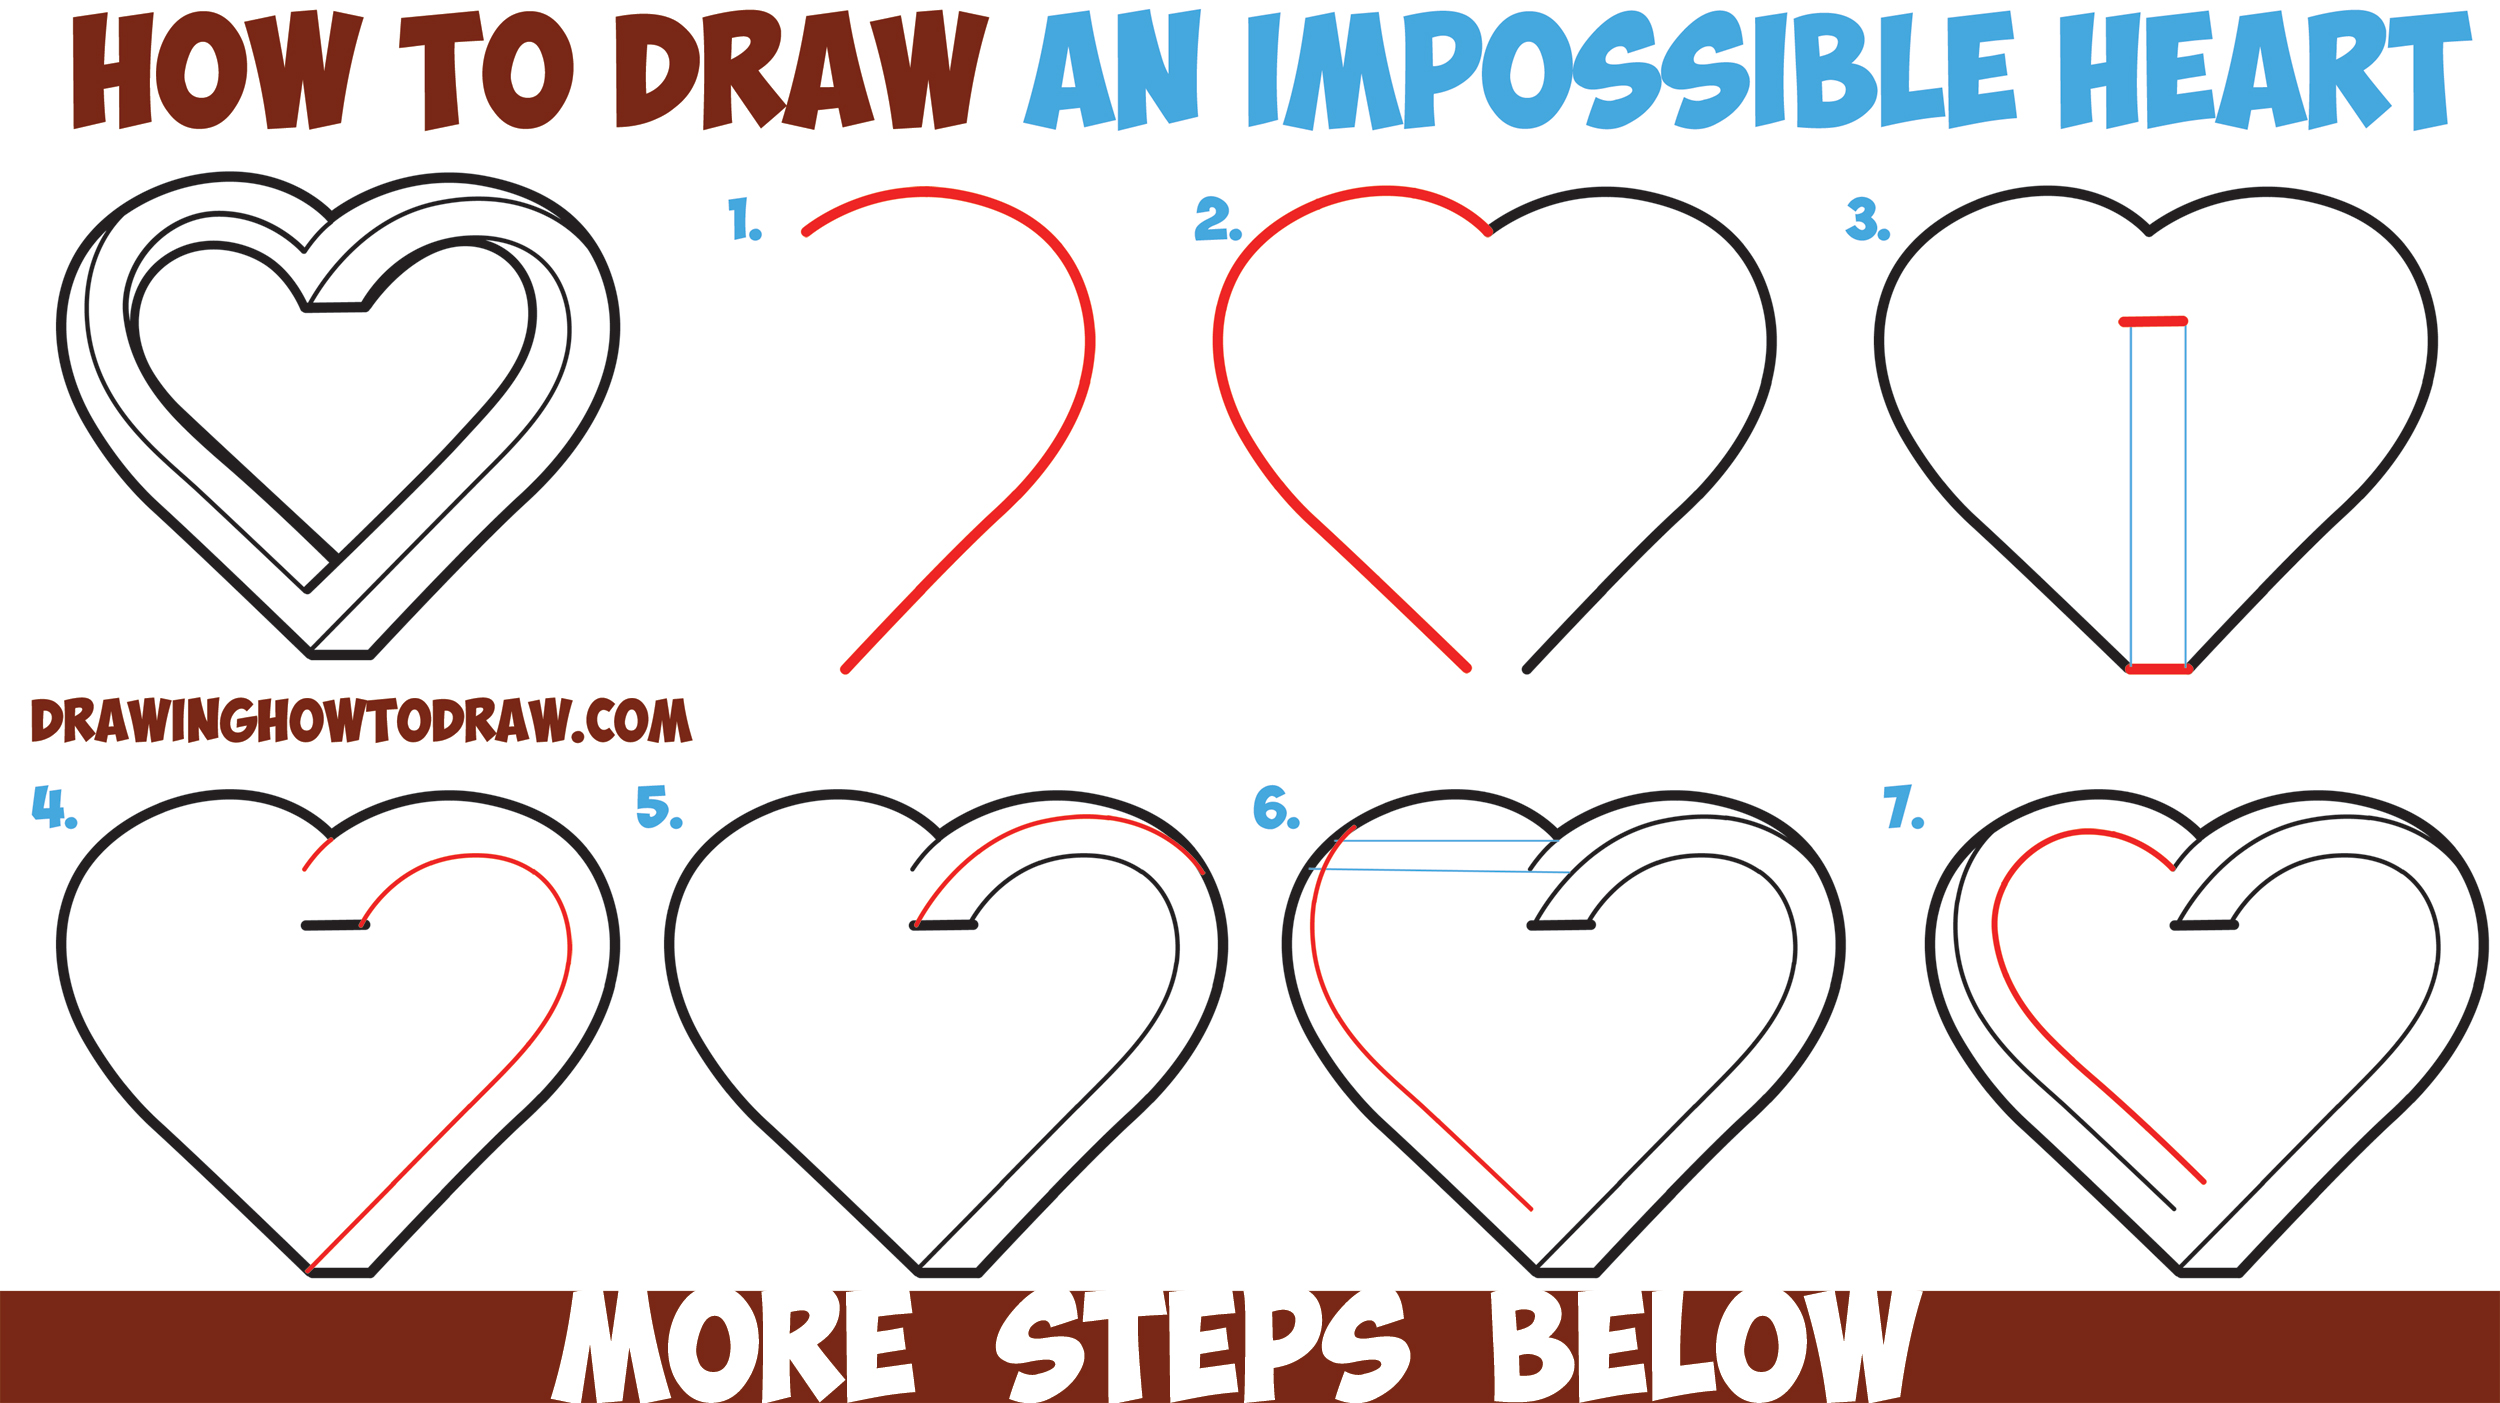
How To Draw Faces Step By Step - How To Draw Step By Step Drawing Tutorials

Photo Credit by: bing.com / draw drawing step faces books learn kids easy children drawinghowtodraw
How To Draw A Face Step By Step With Pencil - Lander

Photo Credit by: bing.com / proportions
Pin By Haya Alotaibi On Art | Realistic Drawings, Face Art Painting

Photo Credit by: bing.com / drawings pencil face realistic drawing
1569 Best Images About Drawing & Colored Pencil Techniques And Examples

Photo Credit by: bing.com / drawing draw face pencil step drawings faces tutorials female
Realistic Face Drawing Step By Step

Photo Credit by: bing.com / realistic face drawing step draw tutorial ts don faces sketch tutorials hildurko drawings portrait choose board pencil